Showing posts with label yummy. Show all posts

Thursday, 29 August 2013

Orange Cheesecake

I was feeling like cooking yesterday but I didn't know exactly what it was that I wanted to do. When my heart's not in it, anything I make is a good as useless. 
I poured through some of my favourite cookbooks and my mum's too but didn't find anything that made me jump to the cupboard and start measuring flour. 

I looked around the kitchen, my eyes resting on the fruit basket laden with a thousand oranges and a few grapefruit that we're forbidden to eat. Oranges it was then. 

I looked at chocolate orange cakes, orange trifle, orange and cranberry muffins - everything with that word in it but I found nothing. So I resolved to make it up as I go along. 

I grabbed a grater from the drawer and pulled thin ribbons of orange peel off and into a bowl. With the juicer in hand, I squeezed 2 oranges dry then scoured the fridge for what else I could add to this concoction. 

I was adamant that what ever I made was heading straight into the bin but after pouring icing sugar, Philadelphia, whipped cream and gelatin in the bowl, I had a cheesecake filling. I made a base for the dessert (crunching digestives with melted butter) and left it in a loose-bottomed tin over night. 

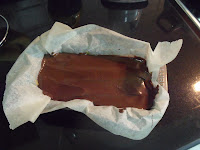
And this is what I got ... 


A very thin, but otherwise perfectly formed, orange cheesecake complete with a rose design made out of orange peel. 


Whether it tastes any good is still a thought that hangs in the air but nevertheless, if it doesn't taste that good at least it will have been nice to look at! 

Thursday, 22 August 2013

Carrot and walnut cupcakes

These delicious little cakes were SOOOO moist and delicious. Every mouthful was a mixture of soft fluffy cake pickled with the crunch of walnuts. The colour of them was just lovely!! The orange strands of fresh carrots really brightened them up! :D (I'm just in LOVE with these!) 


They read didn't take long to bake either. Just 15 minutes before they were beautifully golden and firm to the touch. Absolutely delicious, if I do say so myself. :D 
To finish them off I iced them with a Philadelphia and icing sugar mixture with orange juice. That really finished it of. The icing was just so smooth and mixture of textures and colours was just divine! 


I'm using the recipe from my absolute favourite baking book at the moment: 'Home Baking'. I adore books and for me I low nothing more than sifting through cooking books :D I bought it last summer in 'The Works' in the UK for about £3.99 and every recipe I've made from it has turned out remarkably well for a heavy handed and poor decorating baker like me! 

As far as I can tell, 'The Works' no longer sells the book but follow the link below for the book on Amazon: 

tinyurl.com/k2whvmc

Thursday, 24 January 2013

Lemon Drizzle

I was very lucky this Christmas to receive Paul Holloywood's 'How to Bake' recipe book. It features some wonderful recipes including this; which is named Mr's Post's Lemon Drizzle Cake. I made it today and it was an absolute treat and very light and fluffy. I found it best to do this recipe solely with a wooden spoon.

Makes 9 squares
Ingredients:
Cake:
75g butter
125g caster sugar
150g self-raising flour
1 tsp baking powder
2 eggs
1 tbsp lemon curd
2 1/2 tbsp full-fat milk

Drizzle:
2 1/2 tbsp lemon juice
2 tbsp granulated sugar

Method:
Pre-heat oven to 180 degrees

  1. Beat butter and caster sugar together until light and fluffy
  2. Add all the other ingredients (for the cake) and beat until thoroughly combined
  3. Pour the mixture into a medium square baking tray
  4. Bake for 25 minutes or until golden
  5. As soon as the cake is taken out of the oven, mix the lemon juice and sugar (for the drizzle) in a small saucepan until just boiling (with small bubbles forming on the edges) and the sugar is dissolved
  6. Pour evenly over the hot cake and allow to completely cool
  7. When cool, cut into 9 squares
  8. If you want, dust with icing sugar

Almond Shortbread

These shortbread biscuits are made at the suggestion of my good friend Danielle (www.greyeyesblueskies.blogspot.com) and were great to celebrate the end of my Jan exams! :D These were delicious but just needed a tad more sugar to the original recipe (which I have now added). I hope you enjoy their melt-in-the-mouth texture as much as I did!

Makes 15
Ingredients:
150g plain flour
150g butter
75g cornflour
100g caster sugar
1 tsp almond essence
handful of flaked almonds

Method:
Pre-heat oven to 170 degrees

  1. Either in a food processor or with a wooden spoon, combine the flour, butter, cornflour, caster sugar and almond essence until it forms a strong dough (about 3 mins)
  2. Place into a lined medium square baking tray and flatten to fill out the tray
  3. Sprinkle the flaked almonds evenly on top and prick the shortbread all over with a fork
  4. Bake for 40 minutes until golden and firm
  5. Leave until lukewarm and them cut out 15 pieces leaving in the tin
  6. When completely cool removed and store

Wednesday, 9 January 2013

Juicy Teabread

This is a very quick, store-cupboard fruit loaf (or teabread) that is a perfect uni recipe or alternatively a lazy Saturday one (or Sunday if you're not in the middle-east). I've made this before and I find it so tasty so I wanted to share it with you.

Juicy Teabread
Ingredients:
Soaked fruit (150g raisins, 150g dried apricots and 50g glace cherries soaked for 30 mins in 150ml boiling water)
75g brown sugar
1 egg
175g self-raising flour

Method:

Pre-heat oven to 180 degrees C
  1. Grease and line a loaf tin
  2. Add the sugar and egg to the soaked fruit, folding in with a spoon
  3. Sift in the flour into the same bowl and fold in until completely combined
  4. Place in the oven for 50 minutes checking that the cake is cooked by inserting a skewer and ensuring that it comes out clean 
  5. After 10 minutes, turn out the cake onto a wire rack to cool

Friday, 4 January 2013

Iced Cinnamon Pinwheels

These quick and easy cinnamon pinwheels are absolutely delicious - if I do say so myself - and are best made a day before consumption.

Iced Cinnamon Pinwheels
Ingredients:
1 cup caster sugar
4 teaspoons ground cinnamon powder
500g puff pastry
1 beaten egg

Method:
Pre-heat oven to 180 degrees C
  1. Grease a large, flat baking tray
  2. Prepare and clean a work-surface by wiping and greasing
  3. In a small bowl combine the sugar and cinnamon and then divide in half (placing half the mixture in one bowl and the other half in another bowl)
  4. Now roll out your pastry into a square about 4cm in thickness and sprinkle evenly one of the bowls of cinnamon sugar onto the surface
  5. Now roll out the pastry into a rectangle of about 2cm thickness pressing down so as the sugar goes into the pastry
  6. Now baste the surface with the beaten egg (don't feel as though you must use all of it, if the mixture gets too wet and runny. Use enough so that the surface is lightly coated and there is no surface run-off)
  7. Now evenly sprinkle the remainder of the sugar on top
  8. Roll the pastry from one short end to the other
  9. Glue the ends together with a brush of beaten egg then cut into thin slices and place on a baking tray
  10. Place in the oven to cook for 20 minutes until golden and bubbling
  11. Leave on the tray until cool before removing
  12. You can decorate the pinwheels with glace icing by mixing around 50g of icing sugar with 2 teaspoons of warm water (adding more if needed) until the correct consistency is created and topping with a cherry 


Monday, 31 December 2012

NYE Mincemeat and Apricot Plait

Happy New Years (Eve!!!) This is a quick recipe that I've rustled up this evening for my family - our last of 2012. It's super super quick (because it cuts corners) and is a very easy way of using up your leftover mincemeat. I wish you could have seen the one I made before because it was far better than the pictured (unfortunately we ate it already :D)

Mincemeat and Apricot Plait (Serves 6)
Ingredients:
225g ready-made puff pastry
1 jar of good-quality mincemeat (for example; Robertson's)
15 dried apricots
1 beaten egg

Method:
Pre-heat oven to 220 degrees C

  1. Clean and then grease your work top surface
  2. Roll out the puff pastry until about 1cm thick and in a rectangular shape
  3. Place it so that the short end is facing you and the longer sides are running vertical 
  4. Gently score, lengthways, markings of the thirds 
  5. Evenly spread the mincemeat down the centre third 
  6. Dice the apricots and place ontop of the mince
  7. With the outer thirds, cut diagonal strips about 5cm thick on each side (so as they match), ensuring that they still remain attached to the middle body of the pastry
  8. Begin with the left side and lay the top strip over the filling
  9. Move to the right side and do the same
  10. Continue until all the strips have been laid over the filling and resemble a plait shape
  11. Now brush the pastry lightly with the egg and place in the oven for 20 minutes until golden and opaque
  12. Serve cold with cream, custard or ice cream


Saturday, 22 December 2012

Chocolate Yule Log

Glad Tidings! As Christmas is ever approaching - only 3 days to go :) - my search for culinary dishes more complex in taste AND decoration is beginning to hasten. Today, I decided to try Mary Berry's Chocolate Yule Log after searching on the internet and the result pool returning dry. In comfort, I turned to BBC iPlayer and found a Christmas episode of the Great British Bake Off. The chocolate log by Mary Berry looked absolutely delicious and rich so, with skepticism, I gave it a try. The part of the recipe I was most apprehensive about was making a cake that was thin enough to be rolled and then having to roll it without it cracking. Safe to say, this part was a great success and the entire cake turned out far far better than expected. You should be in complete comfort for this recipe as if I can do it, so can you. All that is required is a relaxed and focused mind, gentleness and slow working.

Chocolate Yule Log
Ingredients:
4 large eggs
100g caster sugar
65g self-raising flour
40g cocoa powder
icing sugar to dust

300ml double cream

300ml double cream
300g dark chocolate
OR 
Betty Crocker 'Rich & Creamy' Chocolate Frosting

Method:
Pre-heat oven to 200 degrees C

  1. Grease and line a swiss roll tin (a metal cooking tin that it large so the mixture will spread very thinly)
  2. Whisk the eggs and sugar together until pale and slightly thicker (It should resemble a loose meringue mixture) 
  3. Sift in the self-raising flour with the cocoa powder into the egg mixture and gently fold in, careful not to knock out the air of the mix
  4. Spread thinly into the tin, ensuring that the mixture reaches the sides and bake for 8-10 mins (I found that mine was fine with only 8 mins)
  5. Meanwhile, cut a piece of greaseproof paper that is larger than your tin that is now in the oven and dust liberally with icing sugar
  6. Insert a skewer into the mixture once removed from the oven to check that it is cooked (it should come out clean without any sticky residue)
  7. Quickly yet carefully, turn out the cake onto the parchment dusted with icing sugar and peel off the backing
  8. Now, score a line about 2.5cm in, on the long side of the cake and roll tightly from this end, rolling the greaseproof paper inside of the cake (The scoring ensures that the cake will roll tightly and therefore won't unbind whilst cooling)
  9. Leave to cool completely
  10. Whisk 300ml of double cream until stiff
  11. Once the cake is cooled, gently unwrap and spread the cream evenly inside
  12. The re-roll without including the greaseproof paper
  13. Roughly, cut about one third of the log at an angle and attach to the side of the longer end so that it resembles a thick branch (Place this on a serving dish)
  14. Now make the ganache that will coat the log by heating 300ml of cream until scalding then removing from the heat
  15. Add the chocolate broken into squares and stir continuously until melted
  16. Place in a piping bag with star nozzle and pipe long verticle lines atop of the cake until completely covered 
  17. To finish, sprinkle icing sugar over the top to create a snowy effect


Friday, 21 December 2012

(A Cheat's) Mince Pies

Father Christmas is on his way so what better way to greet him than with some warm, melt-in-the-mouth mince pies. Although I'm usually all for good honest, home-made food (quite a Jamie Oliver - I know :P) I just had to cheat with this one. For me, mince pies are and have always been the epitome of Christmas, if we exclude the GORGEOUS stuffed salmon parcels my parents make on Christmas day. I'm not quite sure why it is that I idolize these scrumptious pastries so much but I do think that the key to a good mince pie lies within the juiciness of the mincemeat and that perfect pastry that dissolves like candyfloss on the tongue.

A Cheat's Mince Pies
Ingredients:
Butter (for greasing)
1 Pack of shortcrust pastry (pre-cut into squares)
1 Jar of good quality mincemeat (e.g. Robertsons)

Method:
Pre-heat oven to 200 degrees C

  1. Liberally, grease the inside of a yorkshire pudding tin with butter
  2. Lay each individual sheet of shortcrust pastry out on a greased surface
  3. Cut out a circle in the middle of the pastry with a circle biscuit cutter and place in one of the yorkshire pudding holes
  4. DO NOT DISCARD THE EXCESS PASTRY, leave it to one side 
  5. Continue steps 3 and 4 until you have cut 12 circles
  6. Place in the oven for 5 minutes 
  7. Meanwhile, on a greased surface, roll the excess pastry into a ball
  8. Roll out thinly and evenly with a rolling pin and cut from it 12 stars that will partially cover the top of the mince pies
  9. When cooked, remove the pie cases from the oven, leaving it on
  10. Spoon about 1 tsp of mincemeat into each case and top with a star
  11. Place back into the oven for a further 10-15 minutes until golden brown and bubbling
  12. Remove from oven and leave to cool before removing from the tin


If you fancy a proper HOME-MADE mince pie recipe please visit:
http://www.bbcgoodfood.com/recipes/1813664/mince-pies

Christmas Cupcakes

So, yesterday was the last day of term 1 and now we're off for the Christmas break - I'M SOOOO EXCITED!! But just because we were breaking up, it didn't stop me cracking a few eggs and getting in the Christmas cooking spirit; I made 24 cupcakes for my friends and classmates complete with a variety of winter decorations.


Sunday, 9 December 2012

Millionaires' Shortbread

So, with the arrival of Christmas, out go all those mini-skinny veggie diets that supposedly are meant to make us look like Kate Moss and let's get REAL. Say hello, this festive season, to over-indulgent and calorific desserts!
This sweet treat is the perfect way to kick-start your Christmas as you mean to go on. With a thick layer of caramel sandwiched between a melt-in-the-mouth shortbread and silky chocolate it is eagerly awaited by every sweet tooth - mine included!

Millionaires' Shortbread
Ingredients:
50g brown sugar
125g butter
150g self-raising flour

397g can of sweetened condensed milk
125g butter
75g light brown sugar
2 tbsp golden syrup

75g plain chocolate

Method:
Pre-heat oven to 180 degrees C
  1. Grease and line a deep and thin, oblong tin
  2. Cream together the brown sugar and butter for about 3 minutes
  3. Mix in the flour with a metal spoon
  4. Spoon the mixture into the tin and flatten with your knuckle until the mixture covers the base of the tin completely
  5. Place in the oven to cook for 20 mins and then remove, turn off your oven and leave to cool
  6. Whilst the above is cooling, place the condensed milk, butter, brown sugar and golden syrup in a deep pan and cook over a low heat until the butter is melted and the sugar has dissolved
  7. Then increase the heat to bring the caramel to a boil (but NOT TOO HOT) and stir for 10 mins
  8. Pour the caramel over the baked shortbread and place into the fridge until completely cool (about 1 hour)
  9. Melt the chocolate in a bowl over a pan of simmering water and then, when smooth, pour over the COOL caramel and leave to set (DO NOT PUT THIS INTO THE FRIDGE) 
  10. Once entirely set, cut into squares and indulge


Saturday, 17 November 2012

OH YEAH Brownies!

These brownies are from a recipe I picked up on the internet but they are the best that I've ever had the pleasure of making!

Brownies
Ingredients:
100g butter in chunks
200g milk chocolate in chunks
4 eggs
250g caster sugar
1 tsp baking powder
30g cocoa powder
100g plain flour

Method:

Pre-heat oven to 180 degrees C

  1. Individually place each chunk of chocolate with one of butter in a heat proof bowl over a pan of boiling water until melted. Then add the next pair of chunks
  2. Continue until all is melted then leave to cool until room temperature
  3. In this time, grease and line a square or round medium cake tin
  4. Separately, whisk the eggs with the caster sugar until very pale and marginally thicker
  5. Fold the chocolate into the above mixture until completely combined, taking care not to remove the air 
  6. Sift together the baking powder, cocoa and plain flour in a separate bowl and the fold into the wet mixture
  7. Spread into your tin and bake for 30 minutes
  8. Remove from the oven and leave to cool - the top should be a light orange/brown colour and slightly cracked. (N.B. If it is like this but a skewer reveals that the inside in still wet, do not return to the oven/ or panic - this is normal. Leave it to cool.)