Monday, 31 December 2012

NYE Mincemeat and Apricot Plait

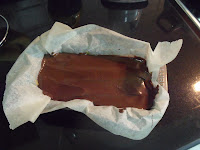
Happy New Years (Eve!!!) This is a quick recipe that I've rustled up this evening for my family - our last of 2012. It's super super quick (because it cuts corners) and is a very easy way of using up your leftover mincemeat. I wish you could have seen the one I made before because it was far better than the pictured (unfortunately we ate it already :D)

Mincemeat and Apricot Plait (Serves 6)
Ingredients:
225g ready-made puff pastry
1 jar of good-quality mincemeat (for example; Robertson's)
15 dried apricots
1 beaten egg

Method:
Pre-heat oven to 220 degrees C

  1. Clean and then grease your work top surface
  2. Roll out the puff pastry until about 1cm thick and in a rectangular shape
  3. Place it so that the short end is facing you and the longer sides are running vertical 
  4. Gently score, lengthways, markings of the thirds 
  5. Evenly spread the mincemeat down the centre third 
  6. Dice the apricots and place ontop of the mince
  7. With the outer thirds, cut diagonal strips about 5cm thick on each side (so as they match), ensuring that they still remain attached to the middle body of the pastry
  8. Begin with the left side and lay the top strip over the filling
  9. Move to the right side and do the same
  10. Continue until all the strips have been laid over the filling and resemble a plait shape
  11. Now brush the pastry lightly with the egg and place in the oven for 20 minutes until golden and opaque
  12. Serve cold with cream, custard or ice cream


Saturday, 22 December 2012

Chocolate Yule Log

Glad Tidings! As Christmas is ever approaching - only 3 days to go :) - my search for culinary dishes more complex in taste AND decoration is beginning to hasten. Today, I decided to try Mary Berry's Chocolate Yule Log after searching on the internet and the result pool returning dry. In comfort, I turned to BBC iPlayer and found a Christmas episode of the Great British Bake Off. The chocolate log by Mary Berry looked absolutely delicious and rich so, with skepticism, I gave it a try. The part of the recipe I was most apprehensive about was making a cake that was thin enough to be rolled and then having to roll it without it cracking. Safe to say, this part was a great success and the entire cake turned out far far better than expected. You should be in complete comfort for this recipe as if I can do it, so can you. All that is required is a relaxed and focused mind, gentleness and slow working.

Chocolate Yule Log
Ingredients:
4 large eggs
100g caster sugar
65g self-raising flour
40g cocoa powder
icing sugar to dust

300ml double cream

300ml double cream
300g dark chocolate
OR 
Betty Crocker 'Rich & Creamy' Chocolate Frosting

Method:
Pre-heat oven to 200 degrees C

  1. Grease and line a swiss roll tin (a metal cooking tin that it large so the mixture will spread very thinly)
  2. Whisk the eggs and sugar together until pale and slightly thicker (It should resemble a loose meringue mixture) 
  3. Sift in the self-raising flour with the cocoa powder into the egg mixture and gently fold in, careful not to knock out the air of the mix
  4. Spread thinly into the tin, ensuring that the mixture reaches the sides and bake for 8-10 mins (I found that mine was fine with only 8 mins)
  5. Meanwhile, cut a piece of greaseproof paper that is larger than your tin that is now in the oven and dust liberally with icing sugar
  6. Insert a skewer into the mixture once removed from the oven to check that it is cooked (it should come out clean without any sticky residue)
  7. Quickly yet carefully, turn out the cake onto the parchment dusted with icing sugar and peel off the backing
  8. Now, score a line about 2.5cm in, on the long side of the cake and roll tightly from this end, rolling the greaseproof paper inside of the cake (The scoring ensures that the cake will roll tightly and therefore won't unbind whilst cooling)
  9. Leave to cool completely
  10. Whisk 300ml of double cream until stiff
  11. Once the cake is cooled, gently unwrap and spread the cream evenly inside
  12. The re-roll without including the greaseproof paper
  13. Roughly, cut about one third of the log at an angle and attach to the side of the longer end so that it resembles a thick branch (Place this on a serving dish)
  14. Now make the ganache that will coat the log by heating 300ml of cream until scalding then removing from the heat
  15. Add the chocolate broken into squares and stir continuously until melted
  16. Place in a piping bag with star nozzle and pipe long verticle lines atop of the cake until completely covered 
  17. To finish, sprinkle icing sugar over the top to create a snowy effect


Friday, 21 December 2012

(A Cheat's) Mince Pies

Father Christmas is on his way so what better way to greet him than with some warm, melt-in-the-mouth mince pies. Although I'm usually all for good honest, home-made food (quite a Jamie Oliver - I know :P) I just had to cheat with this one. For me, mince pies are and have always been the epitome of Christmas, if we exclude the GORGEOUS stuffed salmon parcels my parents make on Christmas day. I'm not quite sure why it is that I idolize these scrumptious pastries so much but I do think that the key to a good mince pie lies within the juiciness of the mincemeat and that perfect pastry that dissolves like candyfloss on the tongue.

A Cheat's Mince Pies
Ingredients:
Butter (for greasing)
1 Pack of shortcrust pastry (pre-cut into squares)
1 Jar of good quality mincemeat (e.g. Robertsons)

Method:
Pre-heat oven to 200 degrees C

  1. Liberally, grease the inside of a yorkshire pudding tin with butter
  2. Lay each individual sheet of shortcrust pastry out on a greased surface
  3. Cut out a circle in the middle of the pastry with a circle biscuit cutter and place in one of the yorkshire pudding holes
  4. DO NOT DISCARD THE EXCESS PASTRY, leave it to one side 
  5. Continue steps 3 and 4 until you have cut 12 circles
  6. Place in the oven for 5 minutes 
  7. Meanwhile, on a greased surface, roll the excess pastry into a ball
  8. Roll out thinly and evenly with a rolling pin and cut from it 12 stars that will partially cover the top of the mince pies
  9. When cooked, remove the pie cases from the oven, leaving it on
  10. Spoon about 1 tsp of mincemeat into each case and top with a star
  11. Place back into the oven for a further 10-15 minutes until golden brown and bubbling
  12. Remove from oven and leave to cool before removing from the tin


If you fancy a proper HOME-MADE mince pie recipe please visit:
http://www.bbcgoodfood.com/recipes/1813664/mince-pies

Christmas Cupcakes

So, yesterday was the last day of term 1 and now we're off for the Christmas break - I'M SOOOO EXCITED!! But just because we were breaking up, it didn't stop me cracking a few eggs and getting in the Christmas cooking spirit; I made 24 cupcakes for my friends and classmates complete with a variety of winter decorations.


Sunday, 9 December 2012

Millionaires' Shortbread

So, with the arrival of Christmas, out go all those mini-skinny veggie diets that supposedly are meant to make us look like Kate Moss and let's get REAL. Say hello, this festive season, to over-indulgent and calorific desserts!
This sweet treat is the perfect way to kick-start your Christmas as you mean to go on. With a thick layer of caramel sandwiched between a melt-in-the-mouth shortbread and silky chocolate it is eagerly awaited by every sweet tooth - mine included!

Millionaires' Shortbread
Ingredients:
50g brown sugar
125g butter
150g self-raising flour

397g can of sweetened condensed milk
125g butter
75g light brown sugar
2 tbsp golden syrup

75g plain chocolate

Method:
Pre-heat oven to 180 degrees C
  1. Grease and line a deep and thin, oblong tin
  2. Cream together the brown sugar and butter for about 3 minutes
  3. Mix in the flour with a metal spoon
  4. Spoon the mixture into the tin and flatten with your knuckle until the mixture covers the base of the tin completely
  5. Place in the oven to cook for 20 mins and then remove, turn off your oven and leave to cool
  6. Whilst the above is cooling, place the condensed milk, butter, brown sugar and golden syrup in a deep pan and cook over a low heat until the butter is melted and the sugar has dissolved
  7. Then increase the heat to bring the caramel to a boil (but NOT TOO HOT) and stir for 10 mins
  8. Pour the caramel over the baked shortbread and place into the fridge until completely cool (about 1 hour)
  9. Melt the chocolate in a bowl over a pan of simmering water and then, when smooth, pour over the COOL caramel and leave to set (DO NOT PUT THIS INTO THE FRIDGE) 
  10. Once entirely set, cut into squares and indulge


Thursday, 6 December 2012

Fondant Icing

So after the success of my FIRST fondant iced cupcakes the other week, I've decided to continue and there is no better way to do so than getting to know my ingredients. This is why I like to make much of my ingredients from scratch where possible and so, I've made fondant (or sugarpaste) icing. This type of icing that can be used to cover cakes - as a base layer - or to decorate by moulding, modelling and colouring. I'm planning to make some Christmas themed cupcakes and so I made this unusually early as a tester to make sure that the recipe ACTUALLY worked and also so that I don't have to fiddle around with cooking cakes as well as experimenting with this new recipe as well as colouring and moulding too. So, here is the recipe that I used...

Fondant Icing
Ingredients:
1 egg white
1 tbsp agave syrup/glycerine/liquid glucose
4 cups (480g) icing sugar
(...that's it!)

Method:

  1. Heat the agave syrup in the microwave for about 30 seconds
  2. Place the egg white and agave syrup in a bowl and stir quickly for about 30 seconds
  3. Then add the icing sugar and with a palette knife use a chopping action to combine the ingredients
  4. When the mixture forms a ball and is slightly less sticky, knead on a surface dusted in icing sugar until pliable and smooth
  5. Store in tightly wrapped clingfilm in a Tupperware box - this will ensure that the fondant doesn't get dry

Saturday, 24 November 2012

Girls Morning

This morning I went with my mum to a creative activity morning hosted by one of the local Churches and the first activity I took part in was a fondant icing workshop. It was the first time that I'd ever tried this type of cake decorating and it was very fun, effortless and effective. It's definitely something that I'm going to stick at! We used pre-bought fondant that was already coloured for usage, a host of fondant stamps and stencils.

These are the three I made;


A red swirled pattern topped with two white snow flakes and decorated with simple edible baubarians

A Christmas pudding - brown, chocolate icing with a white flower and green punched holly leaves topped with red berries

A chocolate fondant dusted with gold edible glitter created by brushing it over a stencil pattern


Plus, the ones I won in the raffle!!!


Saturday, 17 November 2012

OH YEAH Brownies!

These brownies are from a recipe I picked up on the internet but they are the best that I've ever had the pleasure of making!

Brownies
Ingredients:
100g butter in chunks
200g milk chocolate in chunks
4 eggs
250g caster sugar
1 tsp baking powder
30g cocoa powder
100g plain flour

Method:

Pre-heat oven to 180 degrees C

  1. Individually place each chunk of chocolate with one of butter in a heat proof bowl over a pan of boiling water until melted. Then add the next pair of chunks
  2. Continue until all is melted then leave to cool until room temperature
  3. In this time, grease and line a square or round medium cake tin
  4. Separately, whisk the eggs with the caster sugar until very pale and marginally thicker
  5. Fold the chocolate into the above mixture until completely combined, taking care not to remove the air 
  6. Sift together the baking powder, cocoa and plain flour in a separate bowl and the fold into the wet mixture
  7. Spread into your tin and bake for 30 minutes
  8. Remove from the oven and leave to cool - the top should be a light orange/brown colour and slightly cracked. (N.B. If it is like this but a skewer reveals that the inside in still wet, do not return to the oven/ or panic - this is normal. Leave it to cool.)

Wednesday, 14 November 2012

Slap Dash Cheesecake

My dad would probably know me best for the way I always want to hurry some of the most important things. Needless to say I often regret it. But such as guilty pleasure as my very own strawberry cheesecake are calories that I never regret :P
With knowledge of making cheesecakes previously, I made this recipe blindly but it was a great success.

The recipe served 5 and this is what I did;

Crushed 10 digestives and mixed with about 1 tbsp of melted butter. Placed in the clean ramekins/serving cups.
Then, I mixed approximately 125g philidelphia cream cheese, 50g icing sugar and 1tsp vanilla extract in a separate bowl and mixed until smooth. Then, added 3tbsp double cream and topped up with more icing sugar until it became more solid and less runny, so as it wouldn't soak into the biscuits. I then, spooned the mixed on top of the biscuit base and placed in the fridge STRAIGHTAWAY. I then washed enough strawberries to cover the cheese and chopped them into quarters. I washed them and left them to the side whilst I ate dinner. After finishing, I removed the biscuit and cheese desserts and placed the strawberries on top with 2tsp of strawberry jam in each cup.

They tasted gorgeous and very velvety so do not, by any means, be afraid to try this recipe and it may just be one of your favourites! :)

First Friends Dinner

Next Thursday I'm having people round and I'm cooking a meal for them so, before I go shopping over the weekend, I've planned what to cook them. This task, as with anything that I cook, put me under a lot of pressure as it is the first time I've PROPERLY cooked anything for anyone outside of my family and this is all I have been thinking about for a while. But now I finally have it, my dinner party meal! Let me know what you think!

STARTER:
Pea and mint soup with Parma ham

MAIN COURSE:
Breaded Parmesan chicken cutlets with a mixed vegetable couscous, garlic potato salad and an Italian salad served with either lemon mayo or crème fraîche

DESSERT:
Lemon Meringue pie

Friday, 2 November 2012

Banana, Blueberry and Chocolate Muffins

I made these today as a take on the classic banana muffin. As is usual in my household, we had blueberries left over that weren't going to be used anytime soon, bananas that were very over-ripe and an abundance of chocolate, so this recipe seemed to make sense. It is one I've put together myself so I hope that you enjoy!

Banana, Blueberry and Chocolate Muffins
Ingredients:
2 ripe bananas
75g blueberries
50g milk chocolate chips
1 egg
1/3 cup caster sugar
1 tsp baking powder
1 tsp bicarbonate of soda                                                                        
1/2 tsp salt
1 1/2 cup plain flour
1/4 cup brown sugar

Method:

 Pre-heat your oven to 200 degrees C
  1. Mash the bananas with a fork
  2. Add to this the chocolate and blueberries
  3. Now, gently stir in the caster sugar and the egg
  4. Once combined, add the baking powder, bicarbonate of soda, salt and plain flour and mix, ensuring that you are not too vigorous when you do so
  5. Spoon the mixture into a muffin tray lined with muffin cases, filling them 1/2 way
  6. Sprinkle evenly about 1 tsp of brown sugar on the top (In total, for all muffins, this should equate to 1/4 cup)
  7. Bake in the oven for 15-20 mins
  8. Once cooked, leave to cool in the tray for 10 mins until removing
  9. Store in a cool place    

My Banoffee Pie

This my own revised banoffee pie and it is a favourite of mine. It is particularly calorific and just perfect for those lazy weekend evenings.

Banoffee Pie
Ingredients:
150g digestive biscuits
175g melted butter
2 tbsp mixed spice
3 ripe bananas
397g can of sweetened condensed milk
75g soft brown sugar
2 tbsp honey
200ml double cream

Method:
  1. Crush the digestives and mix with 50g melted butter
  2. Add the mixed spice and spread on the bottom of a tart tin
  3. Cut the bananas diagonally and place evenly, in one layer, on top of the biscuit base
  4. Set aside this and place 397g condensed milk with 125g butter, soft brown sugar and honey in a deep pan
  5. Place over a low heat and stir occasionally until the sugar has dissolved
  6.  Then bring to the boil and stir continuously for 10-12 mins
  7. Pour over biscuit base and bananas in the tart tin
  8. Set aside and when cool place in the fridge until chilled 
  9. Whip 200ml cream and spread over the top
  10. Lightly toast a handful of sliced almonds and sprinkle over the cream 


Monday, 29 October 2012

Monday Crumble

This crumble is SO fast to make if you have the correct ingredients and it's one of my favourite family puddings. I created the recipe myself and it's perfect for any sweet tooth.

Apple and Blackberry Crumble
Ingredients:
1/2 cup margarine
1 cup plain flour
4 cups defrosted berries
1 1/2 apples
1 tsp cinnamon
4 tsp caster sugar
2 tbsp brown sugar

Method:
  1. Pre-heat oven to 200 degrees C
  2. Core and peel the apples
  3. Place them in a microwave proof bowl with 1 tsp water and 1 tsp caster sugar
  4. Microwave for 3 minutes
  5. Once steaming, mash with a potato masher until they resemble a pulp
  6. Leave to one side
  7. Now mix 1/2 cup diced marg with the plain flour and rub with your fingertips until it looks like bread crumbs (you may add more flour if the mix is too doughy)
  8. Add 1 tsp caster sugar to this
  9. Wash the berries and place in a bowl with 2 tsp caster sugar and gently stir in the apple
  10. Place this mixture in a stone baking tray and level out until the berries cover the entire bottom of the tray
11. Cover with the breadcrumbs until no berries can be seen
12. Sprinkle the brown sugar evenly over the surface and bake for 20 mins or until the top is golden brown and the fruit is steaming
13. Enjoy warm with a dollop of fresh cream, clotted cream or ice cream

Iced Coffee

Living in the Middle East, the constant sun often beckons a refreshing and energizing glass of iced coffee so, here's my recipe...

Iced Coffee
Ingredients:
Granulated Coffee
Milk
Brown Sugar
Ice Cubes

Method:
  1. Boil some water in a kettle
  2. Place 2 tsp granulated coffee in a jug and dissolve in the water until you make 1/3 of a cup of coffee
  3. To this add 1 tbsp brown sugar and allow to dissolve
  4. Then stir in 1 cup milk
  5. Pour into a glass and add 1 cup ice
N.B. The quantity of coffee is down to personal preference, I don't like it very strong, hence I only put in 2 tsp coffee but this amount can be adjusted and the same amount of boiling water can be used

Saturday, 20 October 2012

Sunday Afternoon Parcels


This dish is a quick and simple short-cut perfect for those Sunday afternoon tea time snacks.


Mushroom Parcels
Ingredients:
18 ready-made puff pastry squares / ready-made puff pastry that can be cut into 9cm x 9cm squares
100g mushrooms
2 tbsp soured cream
1 tsp garlic / 1 clove of garlic (crushed)
Mixed herbs
Salt

Method: 
* Ensure that your puff pastry has thawed before usage *

  1. Pre-heat your oven to 200 degrees celcius
  2. Crush the garlic and fry it in a pan with some olive oil until softened and slightly coloured
  3. Cut the mushrooms into medium slices and place into the pan with the garlic
  4. Add to them a sprinkle of mixed herbs and a pinch of salt
  5. Once the mushrooms have wilted and are soft, mix in the soured cream and remove from the heat
  6. Allow to rest for 10 minutes
  7. Lay out the squares of puff pastry (or cut them into 9cm squares)
  8. When the mushrooms have rested, spoon around 1 tsp of the mixture into the centre of the pastry squares
  9. Fold the top corner over to meet the bottom corner diagonally so that the pastry is halved in a triangle
  10. Now, with a fork, press down on the side to seal in the mixture
  11. Ensure that a baking tray is buttered or greased 
  12. Place the pastries into the tray one by one, taking care not to rip them, and leaving around 1cm gaps between each
  13. Put them into the oven and bake for 20 minutes or until golden brown on the top
  14. If you are unsure about whether the pastry is cooked, flip one of the pastries over and see if the pastry is wet and translucent looking underneath. If so, return into the oven for another 5 minutes. The pastry on the bottom should be of a similar colour as the top and slightly flaky.
  15. Remove from the oven and allow them to rest for 2 minutes before eating
  16. Enjoy warm or cold


Wednesday, 17 October 2012

Megadeath by Cupcakes

18th October is my friend's 18th birthday and so as a birthday treat we're going to see Megadeath - one of her favourite bands - and so, I decided to make some topical cupcakes.

Megadeath cupcakes
Ingredients:
175g butter
175g caster sugar
3 eggs
175g self-raising flour
pinch of salt

Method:


  1. Pre-heat oven to 180 degrees c
  2. Whisk butter and sugar together until pale and fluffy
  3. Beat the eggs in a separate bowl and then gradually whisk them into the mixture
  4. Now, sift in the self-raising flour and whisk
  5. Spoon into paper cupcake cases in a yorkshire pudding tray, filling them half way up
  6. Place in the oven and bake for 25-30 minutes until golden brown, firm and well-cooked in the middle
  7. Top with icing made by combining 1 part butter with 2 parts icing sugar and spread on the cool cakes
  8. Decorate as you wish (I coloured white marzipan black with confectioners food dye and then rolled it out and cut the symbols, shapes and letter with a knife and cutters)
  9. Enjoy!

Sunday, 14 October 2012

Meringue Macaroons

This bake came from the inspiration of the Great British Bake Off - the only tv show I regularly watch, whilst all my other friends are watching America's Next Top Model and Pretty Little Liars to name just a few.

Meringues
Ingredients:
4 egg whites
a pinch of salt
300g caster sugar / or granulated (- it works just fine)
1/2 tsp vanilla extract
1/8 tsp food colouring

Method:
  1. Pre-heat the oven to 150 degrees C
  2. Whisk together the egg whites and salt until the mixture looks foamy but slightly stiff
  3. Now gradually add the sugar - try 1 tbsp at a time - until the mixture is firm and can be tipped upside down in the bowl and not budge an inch
  4. Add the vanilla essence and colouring and gently mix them in with the back of a metal spoon. It is essential to mix this CAREFULLY to avoid destroying the structure of the mixture.
  5. Now pipe the mix with a big nozzle in a piping bag or no nozzle at all into small circles on parchment paper
  6. Put them in the oven and bake for 30 mins - watching carefully at around 25 minutes to ensure that they do not burn
  7. When complete, turn off the oven but leave them in it with the oven door opened slightly to allow the warm air to escape and prevent the meringues cooking too quickly
  8. After around 10 minutes remove them and wait until COMPLETELY cool before removing
  9. Serve with whipped cream in the middle of two, with fresh fruits and/or with cream on top
The end result should be a harder and crunchy outer shell with a soft marshmallow in the middle. 
Enjoy!

Tuesday, 9 October 2012

Dubaicares

Dubaicares is a charity based in the UAE, set up by His Highness Sheikh Mohammed Bin Rashid in 2007. It is an organisation intent on helping deliver primary education to children in Less Economically Developed Countries. At my college we had a bake sale today in aid of this charity so I baked these cupcakes. They are a simple vanilla cupcake mix and creamy vanilla frosting; piped and decorated with edible baubarians. They seemed to go down pretty well!

Saturday, 6 October 2012

A Couple of Cakes


 These are a few of the amateur cakes that I have made recently. I did find making them quite time consuming but, nevertheless, I'm incredibly happy with the results :D


Channel Handbag


Spanish 'good luck' flags


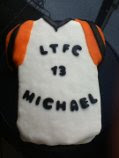
LTFC


'Thank you Miss' 


Life ring


Blackberry Curve


'Happy 18th'